Vue组件设计Sticky布局效果怎么实现
本篇内容主要讲解“Vue组件设计Sticky布局效果怎么实现”,感兴趣的朋友不妨来看看。本文介绍的方法操作简单快捷,实用性强。下面就让小编来带大家学习“Vue组件设计Sticky布局效果怎么实现”吧!
Vue组件设计-Sticky布局
Sticky布局即为粘性定位,常见于一些重要的页面区域在向上滚动时不会被卷起来,在CSS中可以通过设置position:sticky来实现这一功能,但是如果出于兼容性考虑或是一些复杂的场景,就需要我们用传统的方法来实现。
1. 效果示例
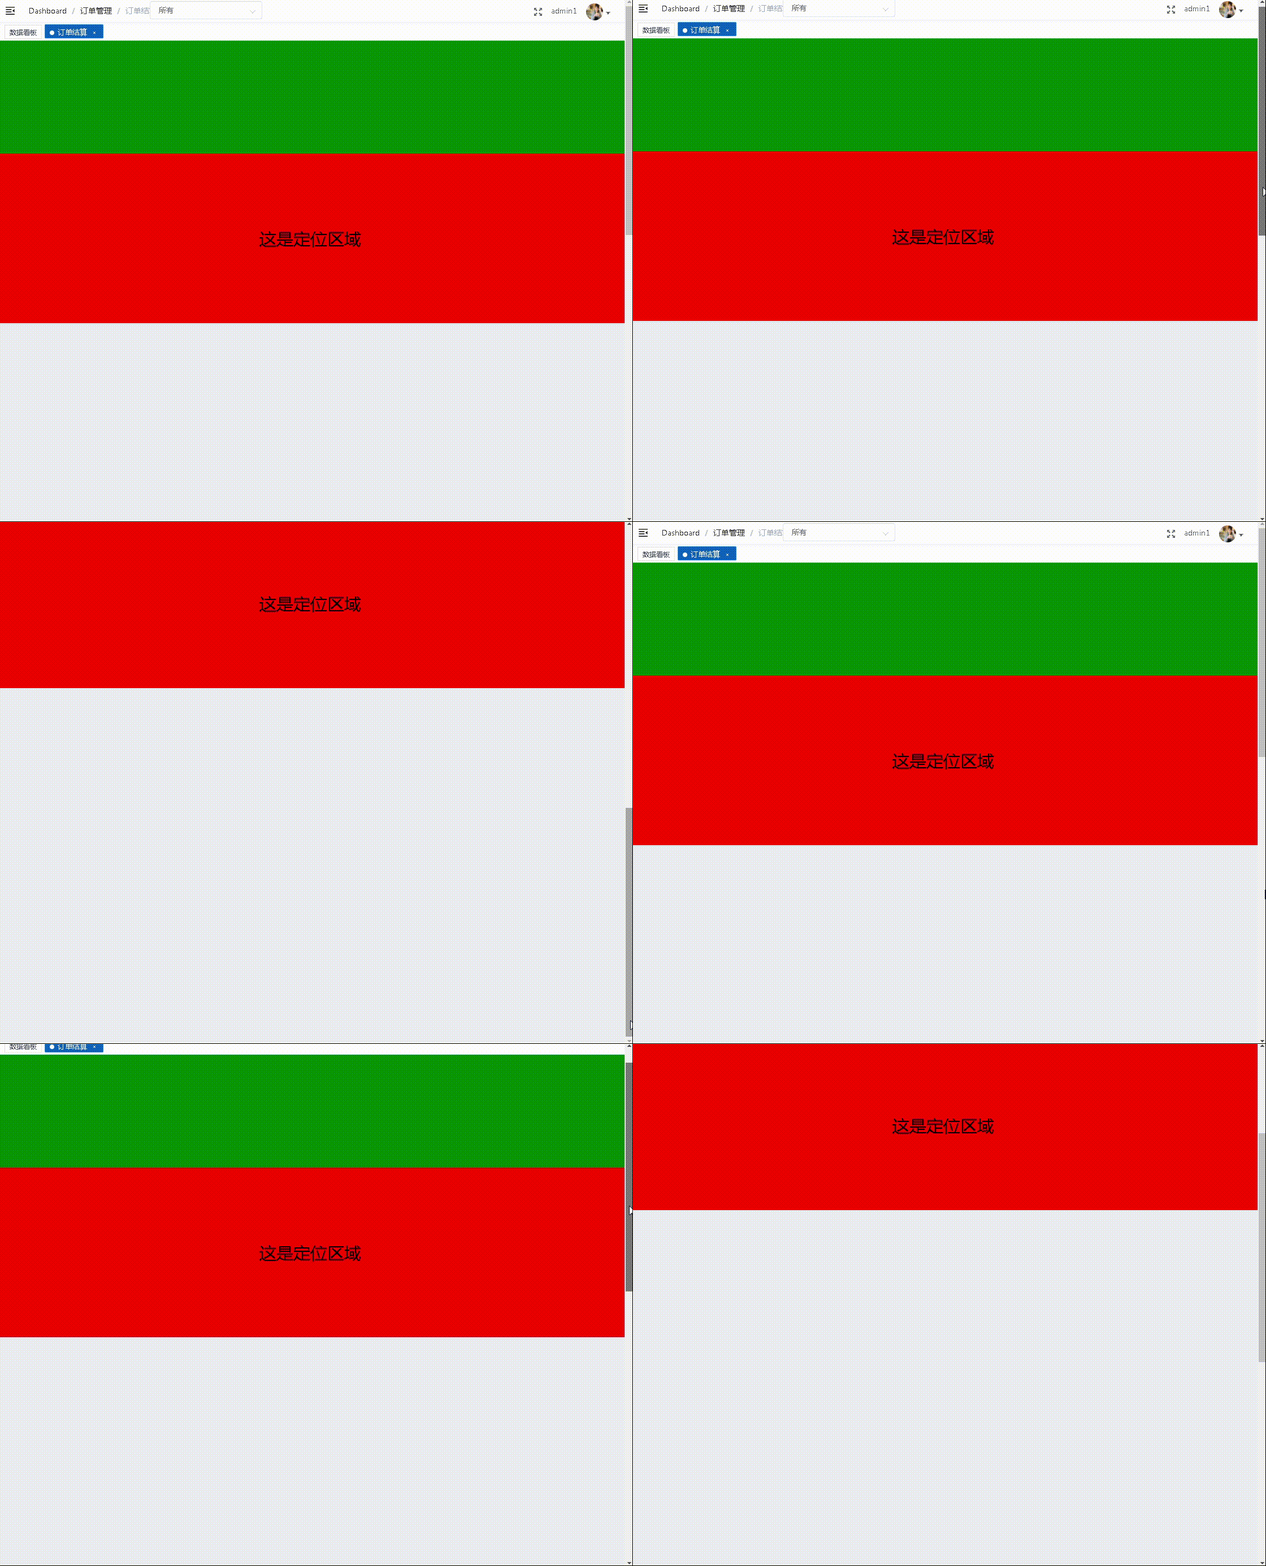
2. 组件封装
<template>
    <div :>
        <div
            :class="className"
            :style="{
                width: width,
                zIndex: zIndex,
                position: position,
                height: height + 'px',
                top: isSticky ? stickyTop + 'px' : '',
            }">
            <slot>
            </slot>
        </div>
    </div>
</template>
<script>
export default {
    name: "Sticky",
    props: {
        stickyTop: {
            type: Number,
            default: 0,
        },
        zIndex: {
            type: Number,
            default: 1,
        },
        className: {
            type: String,
            default: "",
        },
    },
    data() {
        return {
            position: "",
            active: false,
            isSticky: false,
            width: undefined,
            height: undefined,
        };
    },
    mounted() {
        this.height = this.$el.getBoundingClientRect().height;
        window.addEventListener("scroll", this.handleScroll);
        window.addEventListener("resize", this.handleResize);
    },
    // 组件激活时调用
    activated() {
        this.handleScroll();
    },
    destroyed() {
        window.removeEventListener("scroll", this.handleScroll);
        window.removeEventListener("resize", this.handleResize);
    },
    methods: {
        sticky() {
            if (this.active) {
                return;
            }
            this.active = true;
            this.isSticky = true;
            this.position = "fixed";
            this.width = this.width + "px";
        },
        handleReset() {
            if (!this.active) {
                return;
            }
            this.reset();
        },
        reset() {
            this.position = "";
            this.width = "auto";
            this.active = false;
            this.isSticky = false;
        },
        handleScroll() {
            // 粘性定位区域的宽度
            const width = this.$el.getBoundingClientRect().width;
            this.width = width || "auto";
            // 粘性定位距屏幕顶部的高度
            const offsetTop = this.$el.getBoundingClientRect().top;
            // 如果滚动高度小于设定的定位高度
            if (offsetTop < this.stickyTop) {
                this.sticky();
                return;
            };
            this.handleReset();
        },
        handleResize() {
            if (this.isSticky) {
                this.width = this.$el.getBoundingClientRect().width + "px";
            }
        },
    },
};
</script>
3. 组件使用
<template>
    <div >
        <div ></div>
        <Sticky>
            <div >
                这是定位区域
            </div>
        </Sticky>
    </div>
</template>
<script>
import Sticky from "@/components/Sticky";
export default {
    components:{
        Sticky:Sticky
    }
};
</script>
到此,相信大家对“Vue组件设计Sticky布局效果怎么实现”有了更深的了解,不妨来实际操作一番吧!这里是蜗牛博客网站,更多相关内容可以进入相关频道进行查询,关注我们,继续学习!
免责声明:本站发布的内容(图片、视频和文字)以原创、转载和分享为主,文章观点不代表本网站立场,如果涉及侵权请联系站长邮箱:niceseo99@gmail.com进行举报,并提供相关证据,一经查实,将立刻删除涉嫌侵权内容。版权声明:如无特殊标注,文章均为本站原创,转载时请以链接形式注明文章出处。




评论